以前、ミニスケボーにCuBaseをインストールして使ってみました。
結果的には動いたのですが、曲がる事が出来ませんでしたのでやり直し!
今回は「ボードに乗ってどうしても曲がりたい!」という夢を叶えるために試行錯誤した末の結果をまずご覧ください↓
はい、見事に曲がれました!
成功です!
ご存知の方も多いとは思いますが、スケボーは一般的には縦向きに乗る乗り物です。
CuBaseの兄貴分であるCuBoardも縦に乗ります。
走行動画:水上雪上なんのその、悪路も走れる電動スケボー 「Cuboard」発表。4月発売に向けクラウドファンディングへ
しかし、CuBaseでは幅が細すぎて縦乗りは無理!!
バランスが取れんのです。
ですので、横乗りです。
いいんです!曲がれたんですから!
ということで、とりあえず成功したので「乗ってみたい!」という方のために備忘録としてスケボーにインストールさせるためのレシピを残します。
※あくまで個人的な実験としての備忘録なので内容は極めて不親切です。電子工作に不慣れな方は今回はゴメンナサイ。
まずは、ボードとクローラーを接合&圧力センサーをマウントさせるための接続パーツのダウンロード先↓
<Googleドライブ>
こんな固定部品を3Dプリンタでプリントしてボードの車輪の代わりに使います。
CuBaseとの接合にはL型金具が必要です。

けどそのままじゃ横に折れちゃうので、適当なステンレス板で左右のモジュールを固定しました。

先ほどの3Dプリンター製の固定部品には過去記事で作った圧力センサーを設置するスペースが設けてあります。
圧力センサーは適当に作ります(各々の体重とかもあるしぃー・・・ とっても不親切…)
僕は写真の通り、手前と奥に導線と接触している板バネ(車のワイパーブレードの板バネ)があって、下に鉛筆塗った紙、その下にフェルトという構造にしました。

ええ、ええ、現場合わせで、そりゃあもう適当ですよ(笑)実験ですのでね。
それを4セット作って、前後左右の圧力を感知するように調整しました。
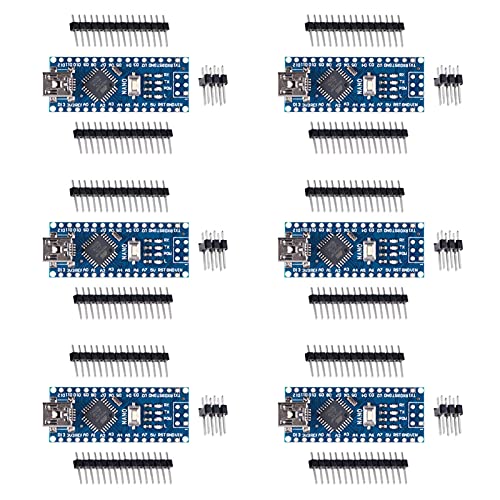
マイコンは手元にあったArduino microです。
これぐらいの用途であればArduino nanoやその互換ボードでも充分でしょう。
Arduinoの良いところはバッテリーの12Vをそのまま「VIN」端子に入力出来ちゃう所です。(モーターと同じ電源で使うなら、大きめのコンデンサぐらいは積んでおくべき)
UNOでもmicroでもnanoその仕様は一緒!
ボード内にレギュレーターが搭載されているので、もしモータードライバー等の他の部品を動かしたい時に5V電源が欲しい時にはArduinoの5V端子から拝借できちゃいます(使いすぎたら壊れるけど)。
今回みたいな用途にはピッタリ!

で、プログラムは「ちっちゃいコードだからわかるだろー」と都度適当に作ったので、コードが肥大化してるけどコメントはありません(あくまで自分用)。
Arduinoをバリバリやってる人がみたら吹き出すウンコードという自覚はあります。
けど、動いてるからいいんです。
<Arduinooの接続ピン>
A0:右前の圧力センサー
A3:右後の圧力センサー
A1:左前の圧力センサー
A4:左後の圧力センサー
5:右モータードライバー入力1
3:右モータードライバー入力2
9:左モータードライバー入力1
10:左モータードライバー入力2
ざっくり、「全センサーが反応したら2秒後に初期ポジションを感知してモーター制御開始する」というだけのコードです。
<Arduinoコード>
newbord.ino
const int sens_FR = A0;
const int sens_BR = A3;
const int sens_FL = A1;
const int sens_BL = A4;const int motor_1A = 5;
const int motor_1B = 3;
const int motor_2A = 9;
const int motor_2B = 10;int def_FR = 0;
int def_FL = 0;
int def_BR = 0;
int def_BL = 0;int old_FR = 0;
int old_FL = 0;
int old_BR = 0;
int old_BL = 0;
int defaultValue = 95;int nowMotor_1 = 95;//0~255
int nowMotor_2 = 95;boolean isFront = true;
void setup() {
pinMode(motor_1A, OUTPUT);
pinMode(motor_1B, OUTPUT);
pinMode(motor_2A, OUTPUT);
pinMode(motor_2B, OUTPUT);
pinMode(stopPin, INPUT);
Serial.begin(9600);
}int scan_FR(){
return analogRead(sens_FR);
}
int scan_BR(){
return analogRead(sens_BR);
}
int scan_FL(){
return analogRead(sens_FL);
}
int scan_BL(){
return analogRead(sens_BL);
}
void stopMotor(){
digitalWrite(motor_1A, LOW);
digitalWrite(motor_1B, LOW);
digitalWrite(motor_2A, LOW);
digitalWrite(motor_2B, LOW);
Serial.println("<Stop>");
}
void resetAction(){
def_FR = 0;
def_FL = 0;
def_BR = 0;
def_BL = 0;
old_FR = 0;
old_FL = 0;
old_BR = 0;
old_BL = 0;
nowMotor_1 = defaultValue;
nowMotor_2 = defaultValue;
isFront = true;
}void runFront(){
analogWrite(motor_1A, nowMotor_1);
digitalWrite(motor_1B, LOW);
analogWrite(motor_2A, nowMotor_2);
digitalWrite(motor_2B, LOW);
Serial.print("<Front> ");
Serial.print(nowMotor_1);
Serial.print(":");
Serial.println(nowMotor_2);
}
void runBack(){
digitalWrite(motor_1A, LOW);
analogWrite(motor_1B, nowMotor_1);
digitalWrite(motor_2A, LOW);
analogWrite(motor_2B, nowMotor_2);
Serial.print("<Back> ");
Serial.print(nowMotor_1);
Serial.print(":");
Serial.println(nowMotor_2);}
void startAction(){
delay(2000);
def_FR = scan_FR();
def_FL = scan_FL();
def_BR = scan_BR();
def_BL = scan_BL();
old_FR = def_FR;
old_FL = def_FL;
old_BR = def_BR;
old_BL = def_BL;
while(true){
int sFR = scan_FR();
int sFL = scan_FL();
int sBR = scan_BR();
int sBL = scan_BL();int FR = sFR - def_FR;
int FL = sFL - def_FL;
int BR = sBR - def_BR;
int BL = sBL - def_BL;if( ( sFR == 0 && sBR == 0 ) || ( sFL == 0 && sBL == 0) ){
break;
}
if( 1 < FR && BR < -1 && 1 < FL && BL < -1 ){
if(isFront == false){
isFront = true;
nowMotor_1 = defaultValue;
nowMotor_2 = defaultValue;
}
if(nowMotor_1 < 246){
nowMotor_1 += 10;
}
if(nowMotor_2 < 246){
nowMotor_2 += 10;
}}else
if( 1 < BR && FR < -1 && 1 < BL && FL < -1 ){if(isFront == true){
isFront = false;
nowMotor_1 = defaultValue;
nowMotor_2 = defaultValue;
}
if(nowMotor_1 < 246){
nowMotor_1 += 10;
}
if(nowMotor_2 < 246){
nowMotor_2 += 10;
}}else
if( sFR < old_FR && sFL < old_FL && isFront == true){
if(defaultValue < nowMotor_1){
nowMotor_1 -= 10;
}
if(defaultValue < nowMotor_2){
nowMotor_2 -= 10;
}}else
if( sBR < old_BR && sBL < old_BL && isFront == false){
if(defaultValue < nowMotor_1){
nowMotor_1 -= 10;
}
if(defaultValue < nowMotor_2){
nowMotor_2 -= 10;
}
}
if(nowMotor_1 < nowMotor_2 -10 ){
nowMotor_1 += 10;
}
if(nowMotor_2 < nowMotor_1 -10 ){
nowMotor_2 += 10;
}
if(isFront){
runFront();
}else{
runBack();
}
if(FR < -1 && BR < -1){
if(defaultValue < nowMotor_1){
nowMotor_1 -= 40;
}
if(nowMotor_2 < 246){
nowMotor_2 += 10;
}
Serial.println("Rotete_L");
}
if(FL < -1 && BL < -1){
if(defaultValue < nowMotor_2){
nowMotor_2 -= 40;
}
if(nowMotor_1 < 246){
nowMotor_1 += 10;
}
Serial.println("Rotete_R");
}
old_FR = sFR;
old_FL = sFL;
old_BR = sBR;
old_BL = sBL;
delay(100);
}
}
void loop() {
int FR = scan_FR();
int FL = scan_FL();
int BR = scan_BR();
int BL = scan_BL();if( FR != 0 && FL != 0 && BR != 0 && BL != 0){
startAction();
}stopMotor();
resetAction();Serial.print("FR:");
Serial.print(FR);
Serial.print(" FL:");
Serial.print(FL);
Serial.print(" BR:");
Serial.print(BR);
Serial.print(" BL:");
Serial.print(BL);Serial.println(" ");
delay(50);
}
以上です。
ところで、「なんでこんな実用的でない乗り物作るの?」と思う現実思考の方もいらっしゃると思います。
実は、これら一見意味の無いような実験をすることで
- クローラーがスピード制御制御出来ることの立証。
- ストレスが少ない加速度の割り出し。
- 方向転換時のスピード制御方法獲得。
- 大負荷をかけても履帯が外れず左右に曲がれることの立証。
をすることが出来るのです。
さらに実用的な運用は別件で考えていますので、そちらは頓挫しなければきちんと回路の組み込みや仕上げまで行なうつもりです。
乞うご期待ください。(・・・できるかな?)
本格派クローラモジュール、CuBaseは実にパワフルで楽しいですよー
<追記>
バッテリーを使いやすくするために、バッテリーアダプターを3Dプリンターで作りました。


